About Noel Arlante

Here are my most recent posts

How To Setup A Chrome Extension For Inline Installation

In my previous blog post, I made a Chrome extension to make JSFiddle default to jQuery library.  I already uploaded the extension to the Chrome developer dashboard but did not press the “Publish” yet. I want to try and setup a chrome extension for inline installation so users can directly download the extension from this site without going to the Chrome Web store.

What settings to make for Inline Installation?

From the developers dashboard you can click edit to setup the extension. I’ve already published my extension as you can see below, but you can still edit.

Chrome Extension Inline Installation Developer Dashboard

After clicking Edit, the setting for the extension will show up. There is an option for inline install which you need to enable if you want inline installation.

Chrome Extension Inline Installation Inline Install Option

Another important setting is the Websites option. You will need to choose a website linked to your Google account. This will be the site where users will be able to do direct installation of the extension.

Chrome Extension Inline Installation Website Option

These are the two main settings you need to enable to setup a chrome extension for inline installation. You can also fill up options like the Visibility, Price, Language and Description for the chrome extension to give more information about what is the extension is about.

Once everything is setup, click Publish to make the extension available from the Chrome Web Store.

Chrome Extension Inline Installation Publish Prompt message


Installation From the Chrome Web Store

To verify the extension you just published, you can search the Chrome Web Store for the extension. I searched the Chrome Web Store and search results returned this. Cool!

Chrome Extension Inline Installation Chrome Webstore Search

You can also click the extension name from the dashboard and it will take you to the extension page from the Web store.

Chrome Extension Inline Installation Extension in Web Store

Go ahead and click the “Free” link to install the extension.

Chrome Extension Inline Installation Install Extension Popup


Setup inline script from the website

Now that the extension is already available from the Chrome Web Store, you can go ahead and setup the links for inline install from your site. I’m using wordpress on my site so most of the setup that I need to do will be from the wordpress admin page of my site.

Add <link> tag in <head>

To add a Chrome web store link to a site you need to add a <link> tag in the <head> of the page you want to add the link. In my case, I can add the script to my wordpress theme page for head script.

Chrome Extension Inline Installation Head Script


 <link rel="chrome-webstore-item" href="https://chrome.google.com/webstore/detail/itemID"> 

Take note that the itemID is the 32 char latin word of you Chrome extesion.

Add Javascript function call to chrome.webstore.install()

The inline installation will happen if the user clicks a link or trigger an installation. Its not allowed to perform the installation without the user triggering an event. From my site, I added a link to call the chrome.webstore.install() function.

 <ul> <li><a href="#" onclick="chrome.webstore.install()" id="install-link">JSFiddle.Net Default To jQuery Library</a></li> </ul> 

Chrome Extension Inline Installation  Setup Link From WordPress


Test the install from the link

To test the installation, I can click the added link from my site and click Add.

Chrome Extension Inline Installation Link From NoelArlante com

Chrome Extension Inline Installation Test Link

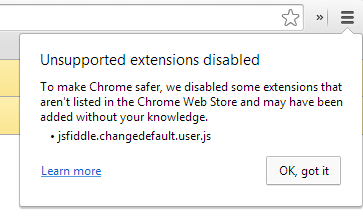
You can then check the installed extension from Chrome://extension. You will notice that the extension does not have the “Not from Chrome Web Store” message below the Enabled checkbox. This means the extension was installed from the Web Store. Nice!

Chrome Extension Inline Installation From Web Store


You can refer to the Inline Install documentation from Google here. I have now an extension that can be installed from the Chrome Web Store or from my site 🙂


Chrome Extension To Make JSFiddle Default To jQuery Library

Google is now forcing users to download and install Chrome extensions that are from the Web Store only. In my previous post How To Make JSFiddle Default To jQuery Library – Update   I was able to create an extension in developer mode of Chrome but this will be disabled once you restart your machine. The solution is to make it an extension that will be downloadable from the Chrome Web Store.

Make a CRX file for the Chrome Extension To Make JSFiddle Default To jQuery Library

Go to chrome://extensions and make sure Developer mode is checked

Chrome Developer mode

Click Pack extension option and then browse to the directory of extension files and click Pack Extension.

Browse to extension files

This will create the .crx file and the .pem file for your extension. The .pem file is the key generated as a signature to the extension. Do not lose this file since it will be the same file required when you modify the extension in the future.

JSFiddle Chrome Extension CRX PEM files

Installing the Chrome extension

Once the crx file is created you can now deploy the extension to your Chrome browser. You can do this using Manual Install or by publishing it through the Chrome Web Store.

Manual Install using chrome://extensions

For manual install, you can just drag and drop the .crx file to chrome://extensions page of your Chrome browser.

JSFiddle Chrome Extension To Chrome Extension Manual

The extension will be installed and is functioning but notice there is a message at the right side under the Enabled checkbox “Not from Chrome Web Store”. This is because I just manually installed the extension. This is one way of Google forcing users to get extensions only from the Chrome Web Store.

Crx file installed on extensions

Chrome Web Store

To upload the extension to the Chrome Web Store, you can go to the Chrome Developer Dashboard site.  . You just need to login with your gmail account and may need to pay a one time fee of $5 if its your first time uploading an extension.

Chrome Developer Dashboard

Click Add new item and then choose the file to upload. Note that you need to zip your extension not the crx file. Google will sign the extension with your account signature and they will be the one to create the crx file.

Chrome extension upload a zip

Chrome extension zip file explorer

Once uploaded, the page will show several options you can set for the extension. One of the important setting or option is the website the chrome extension is associated to. This are the website verified by Google under your Google account.


Chrome developer dashboard website option

You can also set the category, language and the pricing for the extension.

Developer dashboard category and pricing option

The extension can also be set as Public, Unlisted or Private for the visibility option. If Public, the extension can be searched from the Chrome Web Store and is available for download for all users. The Unlisted means the extension can be downloaded only by users who has the download link for the extension and its not searchable from the Web Store. Private means only members of the Google Group or specific developer dashboard accounts can only donwload the extension.

Developer dashboard visibility option

After setting up the options for the extension you can click publish and then the extension will be available for download from the Chrome Web store.

Chrome extension after setup

As you can see I have not published my extension yet. There is another option to make the extension available for download to users which is the Inline installation. For inline installation, the extension is still hosted from the Chrome Web Store but the users can download and install the extension from a link directly from your website. I will talk about more about the inline installation on my next blog post. See you around..


How To Make JSFiddle Default To jQuery Library – Update

In my resolve to not allow my self to go to the same problem of making JSFiddle default to jQuery library , I installed the user script from JohnKPaul to my Chrome browser as an extension. However, after restarting my machine and opening a Chrome window, there is a warning that “the extension is not from Web Store”

Unsupported Extensions Disabled

The warning message when opening again Chrome.

Chrome Allowing Extensions Only From Web store

When you go to chrome://extensions you will see that the extension is now disabled and not working. You cannot enable the extension even if you click “Enable”. No extension means JSFiddle will default back to the “No-Library (pure JS)” library.

Disabled User Script Not From Web Store

User script has been disabled by Chrome. There was no way to enable it.

JSFiddle Default Library No JS

Create Chrome extension for the User Script

When I posted How To Make JSFiddle Default To jQuery Library, it was my plan to convert the user script to a Chrome extension to be able to try and create a Chrome extension myself. I always imagine that someday I can create a Chrome extension and send it to the official Chrome Web Store so everyone can download it. So I think creating a Chrome extension will solve the problem of the user script being disabled since it is not from the Web Store.

Steps on creating the Chrome extension

First, create a manifest.json file. This will contain the information about the extension. The existing extensions you have in your Chrome has their own a manifest.json file. They are located in the Chrome extensions folder C:\Users\[user]\AppData\Local\Google\Chrome\User Data\Default\Extensions.


{
"name": "JSFiddle Default Library to JQuery",
"version": "1",
"manifest_version": 2,
"content_scripts": [{
"js": ["jsfiddle.changedefault.user.js"],
"matches": ["http://jsfiddle.net/*"]
}]
}

Then copy the user script to the same location as the manifest.json.

Extension Folder

How to install the Chrome extension

From the Extensions page, click “Developer Mode”

Chrome extensions Developer mode

Click Load unpacked extension… and then browse to the location of your manifest.json file. Press “Ok” and then you will notice that the extension is now installed and active from the Extensions page.

Testing the new Chrome extension

Now that the extension is installed, go to JSFiddle.Net. The extension made JSFiddle default to jQuery library when you create a new script.

Chrome extension Enabled

JsFiddle Default Library jQuery

Warnings when you restart Chrome

When you restart Chrome you might encounter a warning like the one below.

Disable Developer Mode Extensions Warning

This is a warning to disable developer mode extensions. This is because of the extension added for the user script in developer mode. I will try to make a Chrome extension from the Web Store from this extension in my next post. See you around…

How To Make JSFiddle Default To jQuery Library

You click Run or hit Ctrl+Enter from your JSFiddle session but nothing happens. Yes, that simple jQuery script you are trying to run seems too simple not to work, isn’t it? Then you notice that yes there is an option located in the left side of JSFiddle to choose the javascript library you want to use. You select the latest jQuery version available from the list and click Run. You just had the last 10 minutes sorting out the script making sure it is a valid jQuery script but the problem is that JSFiddle is not using jQuery as the default javascript library. That happened to me too many times, that its really frustrating.

I forgot to make JSFiddle default to jQuery library.

I often forget to make JSFiddle default to jQuery library when my brain is to eager to try and fiddle with an idea and turn it into an actual jQuery script. When you start from scratch JSFiddle’s default library is set No library (pure JS).

JSFiddle Default Library No JS

You need to choose what library you want to use before diving in and coding into the Javascript pane. There must be a way to make JSFiddle default to jQuery library. The left side of JSFiddle is the area for user options. I was trying to find a setting that will make JSFiddle default to jQuery library. But there is no option for that as of this writing.

JohnKPaul user script

I came across the blog post of Mr. JohnKPaul for Changing jsFiddle’s default library to jQuery. He had the same experience using JSFiddle with the library not using jQuery by default. He created a chrome user script to solve this problem. The user script will make JSFiddle default to jQuery library. Perfect!

How do I apply the user script to Chrome?

I’m not familiar with user scripts. Now I have a user script to use on Chrome for my JSFiddle problem but I do not know how to set it up. I attempted to search for an extension to handle users cripts and it pointed me to use TamperMonkey Chrome extension.

TamperMonkey

Tampermonkey userscript manager

TamperMonkey is the Chrome version of GreaseMonkey in Firefox to house and run user scripts. I thought I had the solution to install and setup the user script to Chrome using TamperMonkey but I came across a better solution.

Install the user script using chrome://extensions

A more direct way of installing user scripts in Chrome is to just go directly to the Chrome extensions page. From Chrome go to chrome://extensions and then drag the user script file to the page.

Userscript install to Chrome

JSFiddle User Script Installed in Chrome

The user script will be installed like any extension in Chrome.

JsFiddle Default Library jQuery

Now when you go to JSFiddle and create a new fiddle session, the default library is now showing jQuery 2.x(edge) as the Javascript library. Now I’m happy! 🙂

UPDATE : It seems Google does not allow user scripts to be installed directly to Chrome. I made another blog post as an update to this. Check it here How To Make JSFiddle Default To jQuery Library – Update

Ajax Not Passing Parameters Using Internet Explorer – Solved

I was trying a simple ASP.Net project that calls a web service using AJAX. I just want to try some stuffs I can do with AJAX and JQuery in my desktop. Sort of just diving into the code and expecting that as simple as this would work in 5 minutes. But no, I guess its that kind of a problem that will only happen in your machine and not with others. Thanks to the Download Accelerator Plus installed on my machine I would have not encountered Ajax not passing parameters to the web service. Arrgh!.

Ajax Not Passing Parameters

As you would expect, I got the following components in my ASP.Net project to work on the  simple Ajax call test that I want to do.

Web Service

[WebMethod]
[ScriptMethod(ResponseFormat = ResponseFormat.Json)]
public string CheckIfGalaxyGuardian(string guardian)
{
var guardians = new[] { "Peter", "Gamora", "Drax", "Groot", "Rocket" };

if (guardians.Any(x => x == guardian))
return "We are Groot!";
else
throw new Exception(string.Format("{0} is not a Guardian.", guardian));

}


 Asp.Net Page

<html xmlns="http://www.w3.org/1999/xhtml">
<head runat="server">
<title>JSON Exception Sample</title>
<script src="Scripts/jquery-1.8.2.min.js"></script>
<script src="Scripts/Guardian.js"></script>
<meta http-equiv="x-ua-compatible" content="IE=9" />
</head>
<body>
<form id="form1" runat="server">
<div>
<input type="button" id="btnSubmit" value="Check Galaxy Guardian"/>
<input type="text" id="name"/>
</div>
</form>
</body>
</html>


Javascript

$(document).ready(function () {

$("input[type=button]").click(function () {

var guardian = $("input[type=text]").val();

// Ajax call to service.asmx.
$.ajax({
type: 'POST',
url: 'GuardianSvc.asmx/CheckIfGalaxyGuardian',
data: JSON.stringify({ guardian: guardian }),
contentType: "application/json",
dataType: 'json',
success: function (result) {
alert(result.d);
},
error: function (result) {
var e = JSON.parse(result.responseText);
alert(e.Message);
}
});

});

});

 Invalid web service call, missing value for parameter error

When I ran the application I got the error : Invalid web service call, missing value for parameter… Ajax is not passing the parameters to the web service. When you look at the message in fiddler it will show you that no data was passed into the request.

Fiddler Request Message  Before DAP

Fiddler Response Message  Before DAP

When I tried to use Chrome, it works. So what is wrong with using Internet Explorer?

I tried using the Chrome browser and voila everything is working as expected. I did not do any change in my code. It just works with Chrome.  I tried searching about the issue and I got into this Stackoverflow post about IE refusing to send POST data. One of the comments recommended that uninstalling FDM (Free Download Accelerator) fixed the issue for him. I remember having a download manager on my machine so I tried to look  a download manager installed and saw that Download Accelerator Plus is installed. My hope is restored.

Disable Download Accelerator Plus or Free Download Manager

Download Accelerator Plus  Disable IE Integration

Try again with IE

After disabling DAP on my Internet Explorer, I tried running the same web project and now it works.

Fiddler Response  Ajax working in IE

Not A Guardian

Galaxy Guardian

If you can search Google and hopefully see this post the first time you encountered the same problem, congratulations! I might have saved you couple of hours debugging your program 🙂


How To Transfer App.Config ApplicationSettings to Web.config

Add Web Reference from a class library for .Net 2.0

If you still use .Net framework 2.0, the way to reference a web service to your project is to add a Web Reference.
What if you want to add the web reference from a class library project? This will result to Visual Studio automatically
adding an app.config to your project. The app.config will contain the configuration under applicationSettings of the newly added reference of the web service.

Add Web Reference - ApplicationSettings

Add Web Reference

The app.config will look like this for example.

<?xml version="1.0" encoding="utf-8" ?>
<configuration>
<configSections>
<sectionGroup name="applicationSettings" type="System.Configuration.ApplicationSettingsGroup, System,
Version=4.0.0.0, Culture=neutral, PublicKeyToken=b77a5c561934e089" >
<section name="Noel.Sample.ServiceInterface.Properties.Settings"
type="System.Configuration.ClientSettingsSection, System, Version=4.0.0.0, Culture=neutral,
PublicKeyToken=b77a5c561934e089" requirePermission="false" />
</sectionGroup>
</configSections>
<applicationSettings>
<Noel.Sample.ServiceInterface.Properties.Settings>
<setting name="Noel_Sample_ServiceInterface_ServiceHello_Service"
serializeAs="String">
<value>http://localhost:59962/Service.asmx</value>
</setting>
</Noel.Sample.ServiceInterface.Properties.Settings>
</applicationSettings>
</configuration>

What if you want to use one config file?

Your main application is a web application and it has its own web.config file. What if you want to use and maintain one
config file? You don’t need to point the app.config section from your web.config file. You can move the section group and
the section of the web service from your app.config to your web.config.

Move app.config applicationSettings to Web.config

<configuration>
<configSections>
<!-- For more information on Entity Framework configuration, visit http://go.microsoft.com/fwlink/?LinkID=237468 -->
<section name="entityFramework" type="System.Data.Entity.Internal.ConfigFile.EntityFrameworkSection, EntityFramework,
Version=5.0.0.0, Culture=neutral, PublicKeyToken=b77a5c561934e089" requirePermission="false" />
<sectionGroup name="applicationSettings" type="System.Configuration.ApplicationSettingsGroup, System, Version=4.0.0.0,
Culture=neutral, PublicKeyToken=b77a5c561934e089" >
<section name="Noel.Sample.ServiceInterface.Properties.Settings"
type="System.Configuration.ClientSettingsSection, System, Version=4.0.0.0, Culture=neutral,
PublicKeyToken=b77a5c561934e089" requirePermission="false" />
</sectionGroup>
</configSections>
<applicationSettings>
<Noel.Sample.ServiceInterface.Properties.Settings>
<setting name="Noel_Sample_ServiceInterface_ServiceHello_Service"
serializeAs="String">
<value>http://localhost:59962/Service.asmx</value>
</setting>
</Noel.Sample.ServiceInterface.Properties.Settings>
</applicationSettings>
</configuration>

The section group can be added to the configSections. The applicationSettings can be added under the configuration section of the web.config.

Get value of service URL from Web.Config under applicationSettings

Under appSettings of a Web.config file usually you use for example ConfigurationManager.AppSettings[“WebServiceURL”] to get a value in the Web.config. But when the URL is under the applicationSettings in a Web.config this is how you can get the value of the URL.

public class ConfigHelper
{
public string GetUrl()
{
var section = (ClientSettingsSection)ConfigurationManager.
GetSection("applicationSettings/Noel.Sample.ServiceInterface.Properties.Settings");
var url = section.Settings.Get("Noel_Sample_ServiceInterface_ServiceHello_Service").Value.ValueXml.InnerText;
return url;
}

}

The last step is to remove the app.config from the class library. This is the case if the app.config was added to have the configuration of the web reference. In other cases where you need to the app.config, just remove the configSections and applicationSettings for the web service.

I spent some time looking for a way to make this work and not too much resource from web points to this approach. Hopefully it can help solving yours in less time. Thank you for this post from Stackoverflow on how solve this problem.

Comparing using CompareTo C# Method


A colleague asked me for a suggestion on the program module he is doing that involves determining if one value is “>” greater than, “=” equal or “<” less than another value. I first thought of a solution involving a stack but its too low level and involves much longer code. After some suggestions and trying to think of another way, he came across of a solution to use CompareTo C# method.

What is CompareTo C# Method?

First, MSDN defines IComparable as an interface that “Defines a generalized type-specific comparison method that a value type or class implements to order or sort its instances.” It has a method called CompareTo which as defined by MSDN “Compares the current instance with another object of the same type and returns an integer that indicates whether the current instance precedes, follows, or occurs in the same position in the sort order as the other object.”

The CompareTo method is available on all objects as long as the objects has the same type. See the sample code below for comparing value types integer and a string type.

CsharpCompareTo


The Return Value of CompareTo

The CompareTo method has a return value of int. The integer value return will be one of the values less than 0, 0 or greater than zero as what is shown below.

CompareToReturnValues


Nullable Types Does Not Implement CompareTo

Take note that Nullable types like int? short for Nullable<int> does not implement the CompareTo method. It will not even compile since the method is not implemented.

CompareToNullable

This blog post will serve as a quick reference for me whenever there is a need for me to use sorting or comparison of data when programming. I hope it will serve the same for you.


Changing My DNS Provider to DNSimple – What DNS Record?


Problem with my current DNS provider – GoDaddy.com

I made a blog post two years ago on how I setup this site File -> New Blog Project. As of this writing, this site is using WordPress and GoDaddy.com for web hosting and DNS. Lately, I have noticed that sometimes I cannot access my website noelarlante.com and its admin page. Its maybe my internet provider is slow? or my internet is totally down? A quick access to Google proves otherwise.

I did a trace route to noelarlante.com and to my surprise I got timeouts (* * *) on after a certain ip address. My main hosting ip address is working which means the domain name resolution is not working due to the time out.

Traceroute has started…

traceroute to noelarlante.com (203.124.115.1), 64 hops max, 72 byte packets

 1  192.168.11.1 (192.168.11.1)  1.474 ms  1.515 ms  1.011 ms

 2  192.168.254.254 (192.168.254.254)  1.785 ms  1.685 ms  1.584 ms

 3  180.191.75.1 (180.191.75.1)  17.557 ms  17.863 ms  17.545 ms

 4  10.109.9.65 (10.109.9.65)  17.431 ms  21.192 ms  17.735 ms

 5  120.28.0.193 (120.28.0.193)  18.478 ms  23.496 ms  17.978 ms

 6  120.28.10.93 (120.28.10.93)  18.563 ms  21.173 ms  18.075 ms

 7  120.28.4.94 (120.28.4.94)  49.112 ms  52.709 ms  48.848 ms

 8  203.169.57.37 (203.169.57.37)  48.052 ms  48.126 ms  46.980 ms

 9  xe-5-2-0-xcr1.sgs.cw.net (195.2.10.214)  87.515 ms  86.563 ms  86.042 ms

10  ae0-xcr1.sng.cw.net (195.2.10.149)  77.411 ms  78.375 ms  76.861 ms

11  * * *

12  * * *

13  * * *

14  * * *

15  * * *

16  * * *

17  * * *

18  * * *

19  * * *

20  * * *


Although I still have two more years with GoDaddy DNS, but I have decided to try and use DNSimple.

Moving My DNS service to DNSimple

DNSimple Support page provides a topic on How Transfer Domain Without a Downtime,  which is the perfect information I need to prevent downtime for my website. Transferring a domain to DNSimple was painless. Its just that I missed a step that ended my site to be down for a day – more on that next.

DNS  DNSimpleDomainAddTransfer

Steps on transferring a domain without a downtime

Here are the steps on how to transfer a domain to DNSimple without a downtime based from the Support page of DNSimple. I’ve highlighted the one step I’ve missed.

After doing the *ALL* the steps I thought that I will just need to wait for the DNS to propagate to all servers and then thats it, transfer done. But after awhile I tried to hit noelarlante.com but I got a “Host Unreachable” error on my browser. Something is wrong and I soon figured that there is a disconnect from my DNS to my hosting server.

Problem Solved – I Missed Adding DNS Records

According to Wiki – DNS records or resource records (RR) is the basic data element in the domain name system.
There are many record types that you can use. DNSimple support has the information about each of them – http://support.dnsimple.com/categories/dns/

 I only care about A, CNAME

A – An A record is an Address. This is the record that maps the address i.e. noelarlante.com to my hosting site

CNAME – CNAME is short for Canonical Name. It is the record that maps an alias to an address. The “www” is considered an alias or an address going to noelarlante.com. If no CNAME with “www” is added to the DNS record, www.noelarlante.com will not be resolved to noelarlante.com.
DNS  DNSimpleAddAliasRecord

DNS  DNSimpleDNSRecords

I got my website a new DNS service provider and so far I’m happy with the response time when I visit my site. This is not in anyway a paid advertisement for DNSimple, I’m just sharing my experience and hope others can find this post and not forget that DNS record step.


Notepad++ – Source Code Editor and More


Using Notepad++ with Visual Studio

To compliment Visual Studio, I use Notepad++ as my other source code editor. Visual Studio is still my primary IDE but its good to have Notepad++ on the side for that quick search in files, syntax highlighting depending on the language or even when you want to compare texts or codes. There are other free code editors out there like Notepad2 or Sublime but my vote goes to Notepad++.

My Favorite Notepad++ Features

Syntax Highlighting

Notepad++ Syntax Highlighting

You get to choose from the programming languages like C#, C++, SQL, XML to Objective-C or Perl for syntax highlighting.

Find In Files

When I’m working on a big solution file in Visual Studio and I want to look for all references of a specific method, property or keyword I use Notepad++ Find In Files. Instead of waiting for Visual Studio to return to me a list of instances, I just search it with Notepad++. It will take time and it will make Notepad++ unresponsive during search but I can still continue with my coding in Visual Studio.

Notepad++ FindInFiles


Plugins

There are number of plugins that are available for install and download. The plugins manager is also a plugin by itself. Just like Package Manager in Visual Studio its the source where third party features can be found.

Notepad++ PluginsManager


Useful Plugins

TextFx

Notepad++ TextFxUnwrapText

If you find yourself working on a big chunk of text and its supposed to stay on one line, you can use the “Unwrap Text” option of TextFx. It will remove the newline and carriage return characters of the text to make it a one line.

StraightText

XML Tools

If you are working with XML messages that is sent as a one line of string you can use the “Pretty Print with Line Breaks” option of XML tools. This will arrange the XML nodes with proper indention to make it easier for you to inspect the XML string you have.

Notepad++ XMLToolsPrettyPrint

XMLFormattedText


I hope this little note for Notepad++ helps.

LocalDb – SQL Express for Developers


When you install Visual Studio 2012 or higher the Sql Server Express component is also installed on your machine. When you add a connection to a database within VS I normally use .\SQLEXPRESS as the server name.

VSSqlExpressConnectoin

The .\SQLEXPRESS server name is totally fine and it will work. But I noticed that, like when you create a new ASP.Net MVC project, the default connection to the database is pointing to a LocalDb. I do not remember installing any LocalDb server.

New Asp.Net MVC Project

LocalDB Config

Nothing in my local machine services is running as LocalDb.

SQL Express Service

What is LocalDb vs Sql Server Express?

Based on this blog from MSDN SQL Server team, SQL Server Express is still a free version of the SQL Server. However, they decided to release LocalDb as a SQL Express edition for developers that will continue to be small, low footprint and easily configurable with no admin access required.

VSLocalDbConnection

One advantage I can see from using LocalDb is that you can still attach a file database using AttachDbFileName even if the connection is living within the same instance of the sqlservr.exe.

AttachDbFileName feature is a plus for developers who can request for a sample data in a file and use it to attach to the LocalDb just like you are connected to a full version of SQL Server.

As a personal note to myself, I should blog a lot more so expect more blog posts to come from me 🙂