Mirroring On MacBook Causes Page To Shrink

Here is the background

I usually stream movies on my MacBook Pro and then mirror it to my TV to make the viewing much enjoyable, obviously because of the screen size. Here is the setup, my Macbook Pro connected to my TV through a mini display port to HDMI cable. It’s a common setup when you want to connect your laptop to your TV or any display.

The problem?

The problem is when I connect my Macbook Pro to the TV, the Macbook Pro’s display will refresh and you should expect the display to be mirrored to the TV display. Yes, the mirroring happens but page turns into a display shrank into half. The shrank page is also mirrored in the TV display which does not happen to the rest of the open tabs. See below what I mean.

Page Shrank in Half

There are times I preload the movie like in Netflix or other stream sites so you can buffer the whole movie before starting to watch. Then the shrinking happens when you connect it to your TV. Not good.

It worked! Here is the trick

You can alway close and then open again the page that shrank but in case you encounter the issue you can always to do this trick to solve the issue. I tried to move the page, resize the page, minimize/maximize the page but it does not work. Then I tried to open the Developer Tools (Option + Command + I) and then close it.
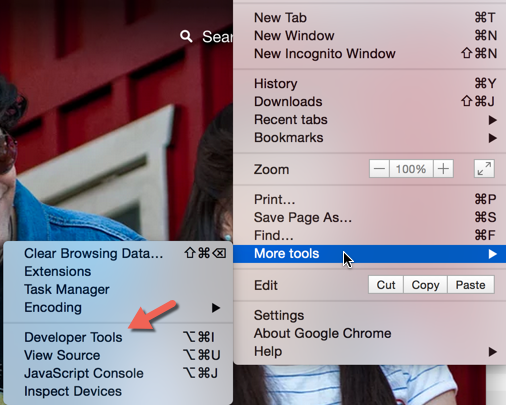
Chrome Developer Tools Options Bar

It worked, the page goes back to full screen mode without opening or closing the page. Saving anything I buffered in the page. Cool.

Rasberry Pi with Raspbmc and AirPlay Rocks!

Raspberry Pi Logo

I’m very excited to play with a Raspberry Pi and see how a tiny computer the size of an iPhone screen would stream to a HDTV movies and other media using AirPlay. If you do not want to get an Apple TV to have AirPlay this is a good alternative. The actual size of a Raspberry Pi is 85.60 × 53.98 mm (3.370 × 2.125 in). This small computer has 2 USB ports, HDMI for video, ethernet port for network and a SD card slot for storage. It just requires a 500 to 700 mA power source to operate which can be provided by common USB ports.

Raspberry Pi  Features wtmk
Raspberry Pi Features and Specifications

Raspberry Pi in Action RS wtmk
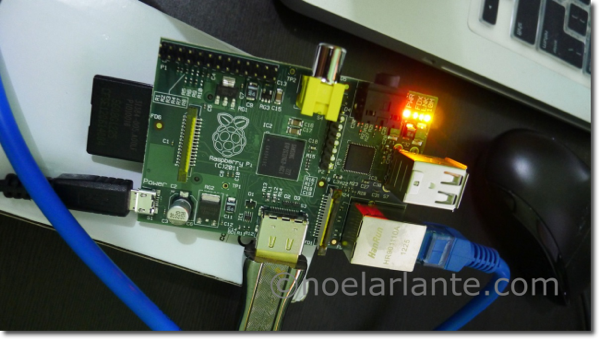
Raspberry Pi with power and ports plugged in

Raspbmc

Raspbmc is a complete installer of XBMC for the Raspberry Pi. XBMC is a free software media player that is available for Linux, OSX and Windows. Raspberry Pi runs on Linux which can be installed with XBMC. Raspbmc made an installer to run XBMC with a Raspberry Pi. It has a Windows and Linux/OSX installer which is very easy to follow.

Installation of Raspbmc

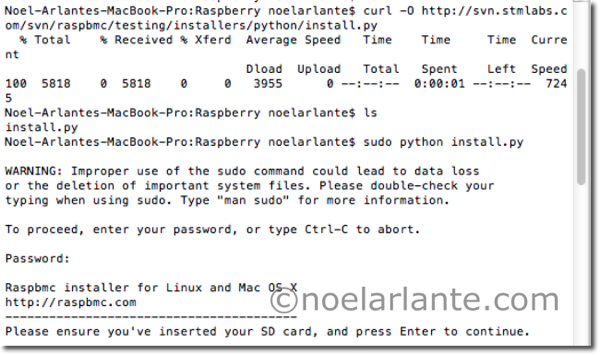
I have an OSX machine so I’ve followed the one for Linux/OS X installation guide from Raspbmc. But there is also available guide for Windows installation here.

Basically from your OS X machine, you need to download the installer and then run the installer (install.py) as root.

Raspbmc Install wtmk

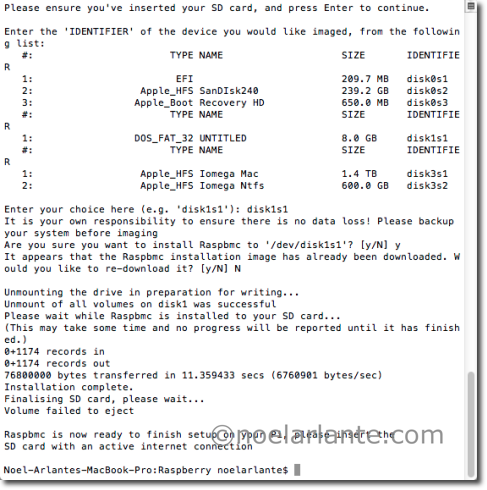
After making sure the SD card is inserted in your OS X machine, you can proceed with the next step which is copying the Raspbmc image to your SD card.

Raspberry Install 2 wtmk

Configuration of Raspbmc

Insert the SD card with Raspbmc image to your Raspberry Pi and power it on.

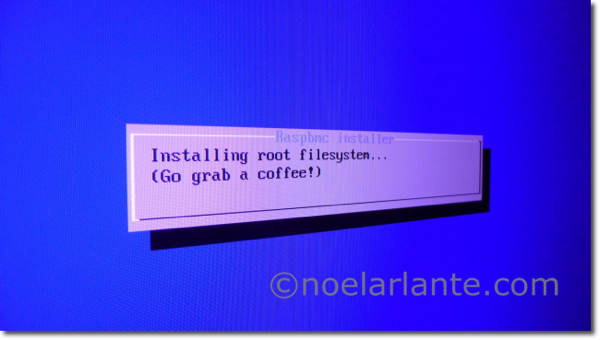
Raspbmc will boot and install additional settings so grab a coffee and wait!

Xbmc Installer RS wtmk

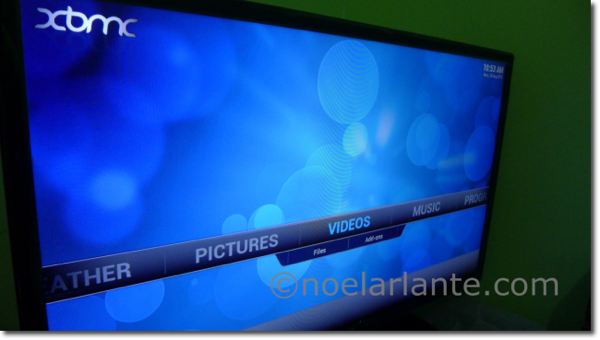
After installation you will see the menu page for Raspbmc.

Xbmc Front Page RS wtmk

AirPlay

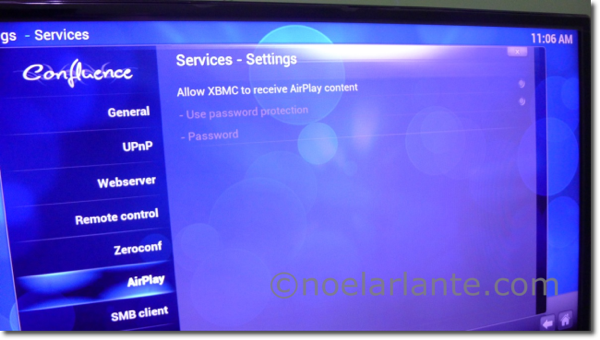
Do not forget to enable the “Allow XBMC to receive AirPlay content” option. Go to Settings – Services – AirPlay.

Xbmc with Airplay RS wtmk

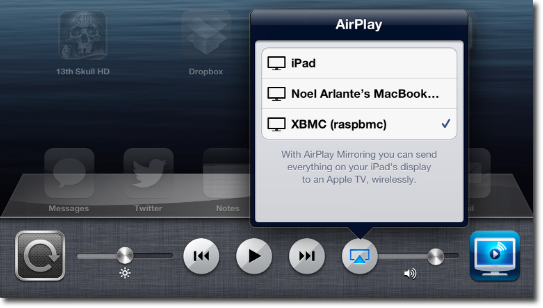
From your iPad or any iOS device with AirPlay you will now have an option to stream to XBMC.

Raspberry Pi Airplay from iPad RS wtmk
Playing YouTube video from the iPad to a HDTV using AirPlay.

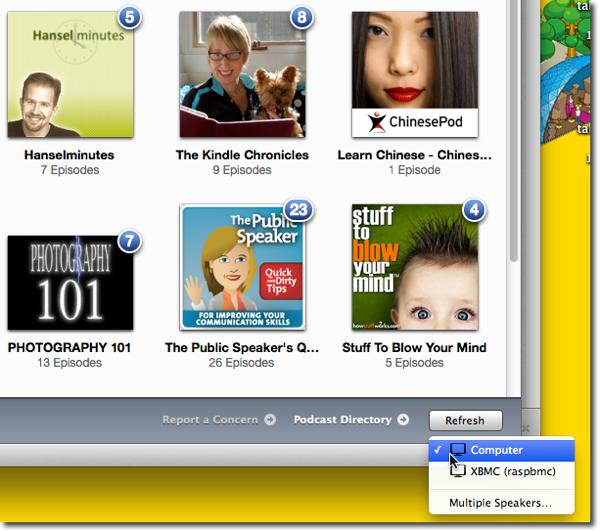
iTunes can also stream using AirPlay your videos and podcasts.

Airplay with iTunes

Since my MacBook Pro is not capable of AirPlay (AirPlay only supports Mac models 2011 and up). I’m using Air Video Server App to stream my movies from my MacBook Pro to my iPad and then from my iPad use AirPlay to stream to my HDTV.

AirPlay iPad with Air Video Server

Thank you to Scott Hanselman’s post on Raspberry Pi with Raspbmc for the information and inspiration 🙂 Raspberry Pi with Raspbmc rocks!