Snipping Tool Slow Response On New Snip

I recently encountered the snipping tool slow response on new snip on my Windows machine. It is causing which I call COD or “cause of delay” when I’m doing my work and trying to finish on time. What happens is when you capture a screen using the Snipping Tool, your machine just freezes up to 4 to 6 seconds before you can get the new snip and move around with your system. Yes, that is a hassle when all you want is to capture the screen. The Snipping Tool was a reliable tool in Windows until I encountered this issue.

Snipping Tool Slow Response Happens Only With Internet Explorer

I made a search in Google and found that this issue only happens when capturing the Internet Explorer screens. To try this I launched the Snipping Tool and made a new snip. I tried to capture the screen from my Chrome browser, it worked. I tried to capture the screen from my desktop and it worked as well. I went back to capture the screen from my Internet Explorer. Voila, my system instantly froze again!

How To Resolve The Issue on Snipping Tool Slow Response On New Snip

Under Tools, go to Options. The Snipping Tool Options will have an option for “Include URL below snips (HTML only)”. Uncheck that option and then try again to capture your Internet Explorer screen.
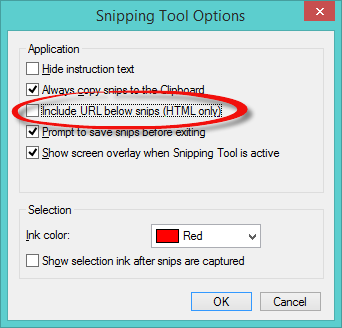
Snipping Tool Options


You will notice that capturing the screen on your Internet Explorer will now work with normal response and without freezing your system. Hope this helps. If you have other Snipping Tools tip, please share them in the comments section. Thanks! 🙂

Google Chrome Extension Download Not A CRX Error

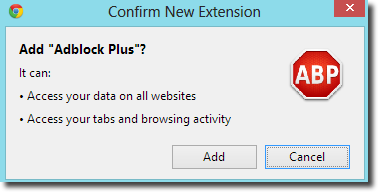
I’m trying to download a Google Chrome extension in my Windows 8 machine. A simple Pop-up blocker like an AdBlock would be a breeze to install right? No.

Chrome Add Extension

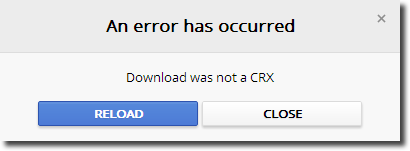
CRX Error

After I received an error “Download was not a CRX” I hit the “Reload” button looking at a simple relaunch is required.

The extension gallery was reloaded but nothing happened, no extension was installed. I tried to do the same steps but got nowhere.

After googling the error, the search pointed me to this blog – http://www.ghacks.net/2012/12/07/fix-chrome-error-download-was-not-a-crx/

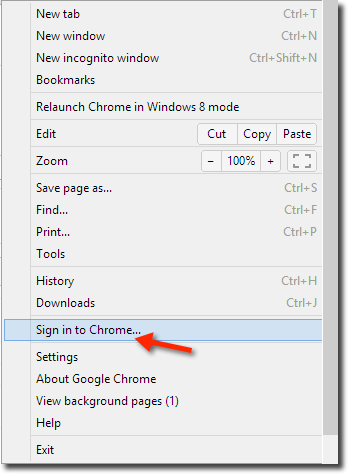
Apparently, clearing the cache or manually adding the extension will not work. You need to sign “Sign-in to Chrome” to make it work.

Sign in to Chrome

I tried signing-in into Chrome as suggested and it worked. It worked without even me doing the same steps from downloading the extension in the gallery to clicking the “Add to Chrome” button.

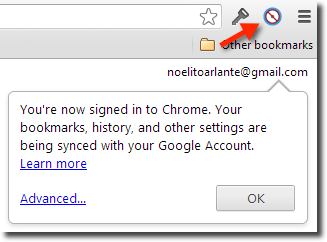
Notice the active AdBlock icon below after signing in.

Signed in to Chrome

Adding an extension in my Chrome from my Mac machine did not require the extra step. Perhaps an extra security for Windows?

Add those extensions now as they may help you to be productive in your tasks. Chrome extensions fire away!

How to Install Hyper-V in Windows 8 Pro and Lenovo W530

Hero hyperv

One of the features included in Windows 8 is the Hyper-V client. In the past, the Hyper-V client is only available from Windows 2008 Server OS now you can have the same feature in Windows 8 Pro. Hyper-V, the machine virtualization technology, lets you run multiple operating systems at the same time on the same machine.

I’ve recently purchased a Lenovo W530 laptop which they called “The Beast”. It has Intel 3rd Gen Core i7 and 16Gigs of RAM(up to 32GB) perfect for Windows 8 Pro and Hyper-V. As a developer, I will need all the resources I can get from this machine.

Enabling Hyper-V Feature

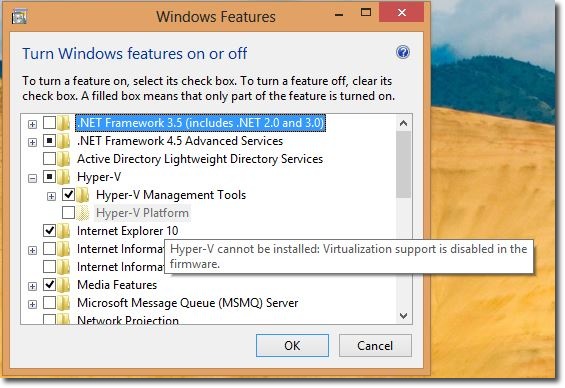
Enabling Hyper-V is simple, just go to Windows 8 features panel to enable. But as you can see below the option for the Hyper-V option is greyed out. Message says “Hyper-V cannot be installed. Virtualization support is disabled in the firmware.

Windows8 Feature  HyperV Disabled withMessage

BIOS Configuration

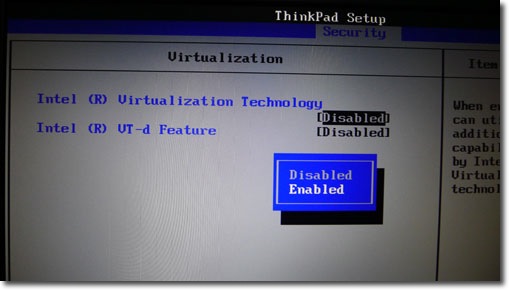
To fix the issue, you need to go to your BIOS and enable the virtualisation option. For Lenovo W530, below is where you can set Virtualization to “Enabled”.

Lenovo W530 Virtualization BIOS rs

Activating Hyper-V

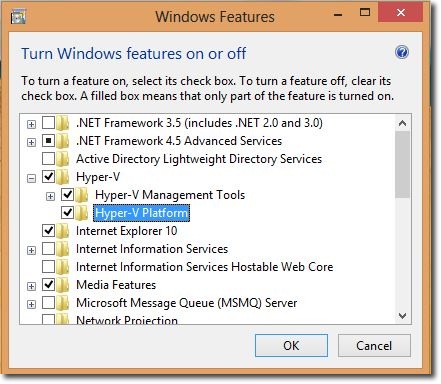
Go back to Windows 8 features and you now can see that the Hyper-V option is enabled.

Windows8 Feature  HyperV Enabled

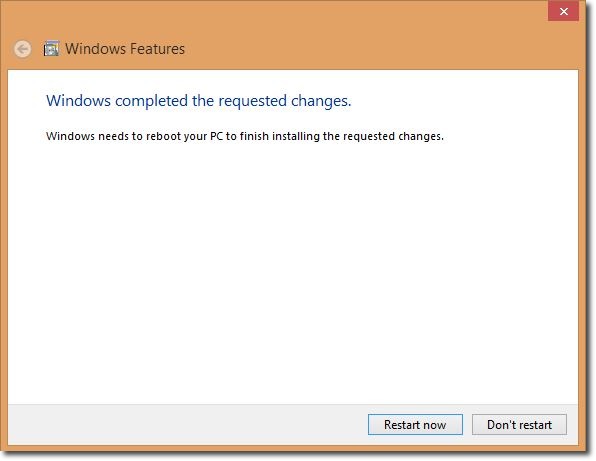
Windows will need to restart after enabling the feature.

Windows8 Feature  HyperV Required Restart

After restart, Launch Hyper-V Manager and proceed with creating your virtual machines.